Today we spend an hour making a simple clock, using an Arduino Nano, and a few cheap & simple components.
You will need:
- Arduino Nano
- DS3231 RTC module (Real Time Clock chip)
- 4 digit, 7 segment display
This build is fairly straightforward, and the code can be put together pretty quickly.
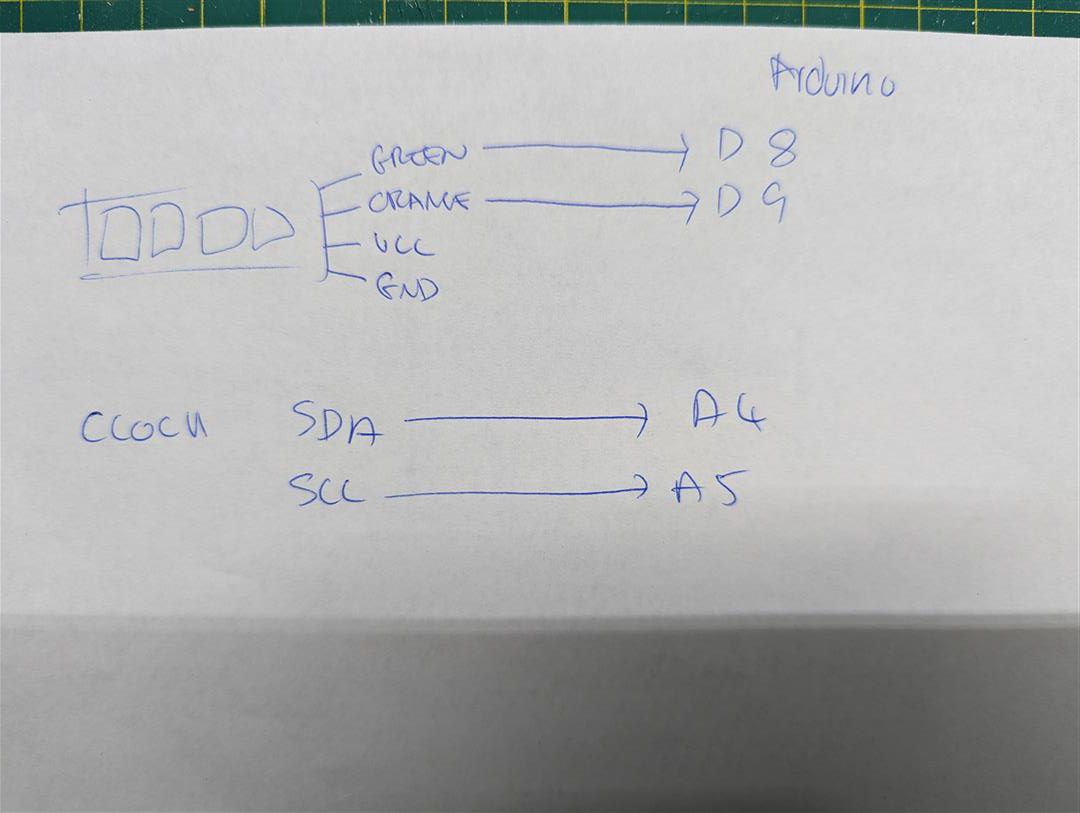
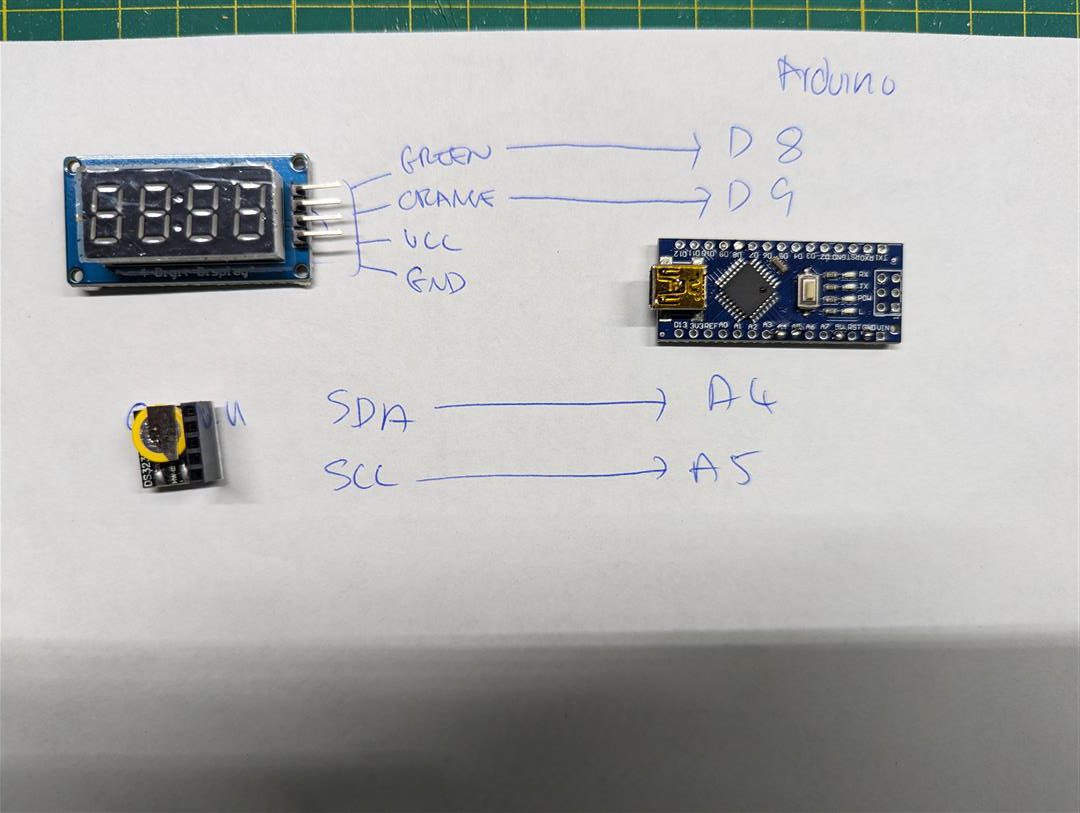
Wiring Diagram
Below is a simple wiring diagram I sketched out after doing a little refresher on the components. I then sat the pieces on top, for dramatic effect.
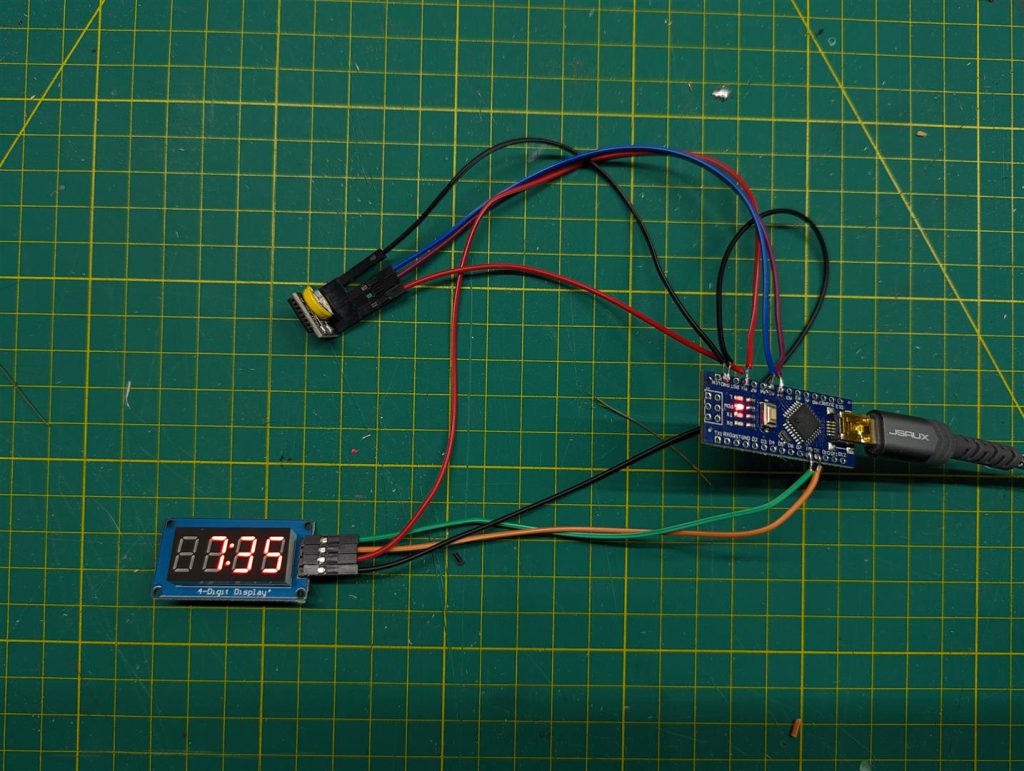
Soldering
Given the simplicity of the circuit, I simple soldered the wires together.
Upload the code
Although the original code took some tweaking, it worked pretty much as is. You can grab it here:
#include <TM1637Display.h>
#include <Wire.h>
#include <I2C_RTC.h>

// 4 digit 7 segment display
#define CLK 8
#define DIO 9

// Create a display object of type TM1637Display
TM1637Display display = TM1637Display(CLK, DIO);

// Clock Module
static DS3231 RTC;
int hour = 0;
int minute = 0;

void setup()
{
  // Setup Serial connection
  Serial.begin(9600);
  while (!Serial) {}

  // Initialize the rtc object
  RTC.begin();
  RTC.setHourMode(CLOCK_H12);

  //Set these values on first run
  //RTC.setDay(9);
  //RTC.setMonth(11);
  //RTC.setYear(2022);

  //RTC.setHours(19);
  //RTC.setMinutes(11);
  //RTC.setSeconds(30);

  // Set brightness
  display.setBrightness(7);

}

void loop()
{
  hour = RTC.getHours();
  minute = RTC.getMinutes();

  update_display(hour,minute);

  // Wait before repeating. This could actually be a much longer time
  delay (2000);
}

void update_display(int hour,int minute){

  int time_as_int = (hour * 100) + minute;

  // This function shows the number right aligned with the : turned on and no leading zeros
  display.showNumberDecEx(time_as_int, 0b11100000, false, 4, 0);
}
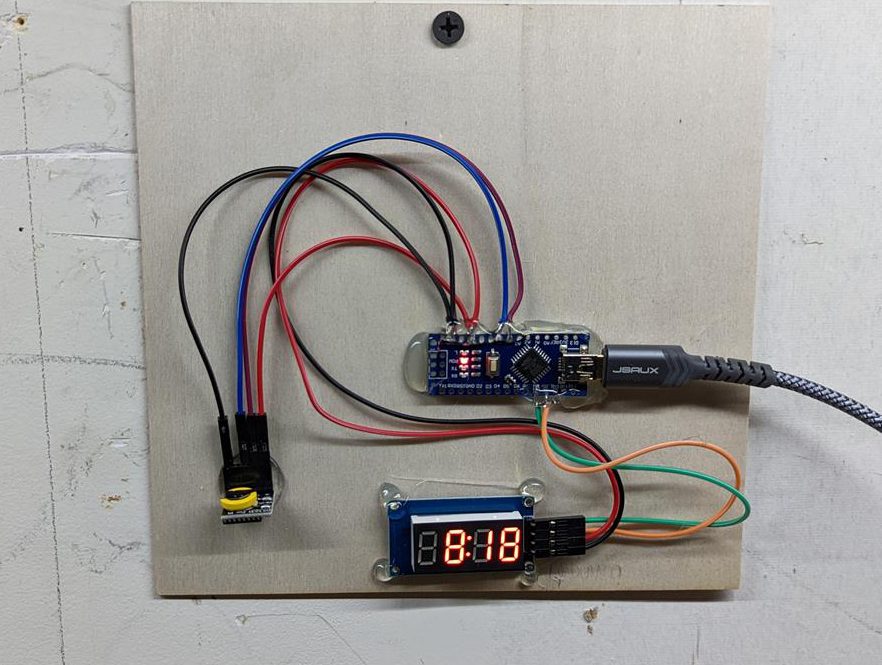
Final Product
Often, I’ve spent weeks or months on preparing the final look and feel. This isn’t one of those jobs. We’re just going to use an entire stick of hot glue and attach it to some thin plywood, then use a drywall screw to mount it.
Hello my name is Kentaza. (from Japan)
I am a beginner in Ardiuno.
Sorry for the abrupt email.
I saw your web(Simple DIY Arduino Clock) and emailed you.
In the uploaded code, which library should I install for the header file (I2C_RTC.h)?
Could you please tell me?
Hi there.
The library is RTC by Manjunath CV which I believe is this: https://github.com/cvmanjoo/RTC.
The description reads:
“Library for I2C based RTCs (DS1307, DS3231, PCF8563). Enables the functionality for clock readying, clock setting, alarms and timers of I2C RTCs.”